Blogger is saying goodbye to the FollowByEmail gadget. This decision came after Feedburner decided to shut down its email subscription service.
It means that we can no longer rely on Blogger to send automated email notification to our subscribers whenever we post new articles. As of July 2021, Feedburner will suspend the service.
Therefore, an immediate replacement is needed. Luckily, I discovered a compatible and free alternative for Feedburner. It is called follow.it.
 |
| follow.it is a free alternative for Feedburner's email subscription service |
My Impression of Using Follow.it
I discovered follow.it when the company
approached me directly via email and asking me to try their service. Based on
my initial impression, follow.it is quite simple to use. It is compatible with
Blogger and we can install it quickly.
Email subscription is an excellent source of traffic because it is
sustainable. Loyal readers will keep visiting our blogs regardless of Google's
ranking. So, replacing FollowByEmail gadget is a big priority. By using
follow.it, we can help our subscribers to be notified whenever we publish a
new post, thus they'll revisit our websites.
For a free service, follow.it seems to have various features that will help blog owners (publishers) to deliver our articles effectively.
If you just want an automated email service to replace the FollowByEmail gadget, follow.it free version is already good enough. No matter how many followers you have, it will cost you $0 to provide your subscribers with email notification.
If you want to get more features, you can upgrade to follow.it paid version. The cost seems to be fairly priced based on the number of the followers you have. Premium features such as follow.it directory is a great way to get more traffic. It provides you with a higher visibility and more followers for your feed by having it listed in their directory.
Read also: Inserting link in Quora Answers - Will It Increase Blogger Website Page Rank?
How to Install follow.it in Blogger
It is simple to use follow.it email subscription service. The installation process is not
overly complex and doesn't take too long. Follow the steps carefully to install follow.it on your Blogger website.
1. Make a follow.it account.
Go to follow.it website and you can
make a free account instantly by signing up using your gmail account.

|
|
Signing up to follow.it |
2. Adding Blogger feed to follow.it
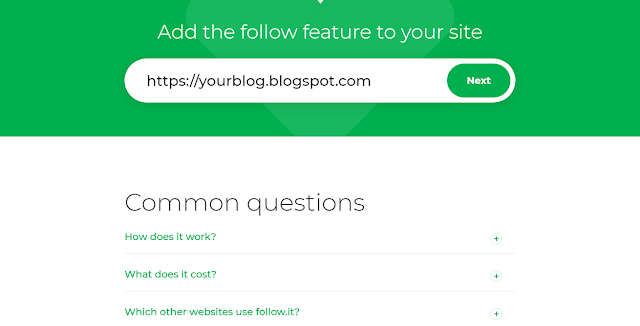
After you have signed up, you will instantly get redirected to your follow.it dashboard. On the left sidebar, click Publishing and the select Add Feed. Then, you simply enter your website url and click Next. A pop up window will appear that will show your website feeds, simply click Continue.

|
|
Add your website to follow.it |
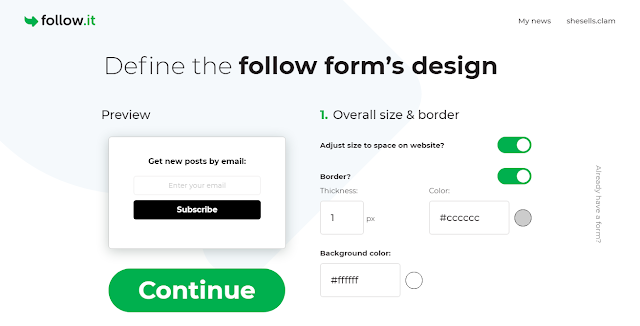
3. Designing the customizable email follow form
The online form will allow your visitor to input their emails and subscribe to
your blogs. You can customize the form provided by follow.it. You can also
design your own form using your own code. After you are satisfied with the
appearance, click Continue. Please note that you can always modify the form
anytime, later on.

|
|
Easy-to-use follow form designer. |
4. Placing the subscription form to your blog
After you have finished designing your form, follow.it will provide you with the code. You can copy and paste this code place it to your website. Go to your Blogger dashboard, then select Layout. At the sidebar part, click Add a Gadget. Select HTML/Javascript and paste the code. You can leave the Title blank or name it as you like. Then select Save. You can adjust the gadget placement from Blogger Layout.

|
|
Add follow.it code into Blogger HTML/Javascript gadget |
5. Placing follow icon and link
In addition to email subscription form, follow.it also provides you with
follow icons and links that can be placed anywhere inside your articles. Your
followers will also be provide with notification when they click the icon or
link. Next, follow.it will also provide you with pop-up notification, but you
can just ignore that.
|
|
|
Follow icons and link that can be inserted into your articles. |
6. Connect your blog to follow.it account
This step is very important to make sure that your subscription form and follow icons work properly. It is essentially a method to claim and activate your follow.it account full functionality.
You will be required to enter your email address to receive activation code, then select Start. Then, go to your Blogger dashboard, select Theme and Edit HTML. Put the code that you receive in your email under the <head> tag. Then click save.
After that, go back to the email where the code is located, and click the activation link.
 |
| Insert the code to the <head> then verify by claiming it using the link. |
7. Successful follow.it implementation in Blogger!
 |
| Your followers will start to receive notification via follow.it whenever you post new articles! |
After you have finished all the steps, you should be able to successfully claim your feed. Now your website will be listed at your follow.it dashboard. You can start managing your subscribers! Try subscribing to your own website. If everything is implemented correctly, your email will appear at your follow.it follower list.
Do not forget to migrate your followers list from Feedburner to your new follow.it account using the import feature. Now your loyal readers will be able to get email notification just like before!
Read also: